


My deepest apologies in advance. This is a project I started almost 2 years ago. WAY before this little blog was even a thought in my glittery brain. So there is some background information that I need to tell you:
I made this ceramic baby in school, in my ceramics class, using a 6-piece-mold. I can't exactly tell you where to buy it, cause, you know, I made it. So unless you have the keys to NYU's ceramic studio, we are kind of screwed in the potential acquisition of another ceramic baby. I'M SORRY.
Now, ceramic babies aren't easy to come by, but the great news is: you can make a lamp out of ANY hollow vessel!! AMAZING, I know. Here are some great substitutes for the ceramic baby: wine bottle, mason jar, ceramic baby. You get the idea.

We need to get something clear:
I know this is a weird item. It's a lamp with a glittery baby as a base. I started making this while I was in art school. As a piece of art. Not as a household item. I think I was trying to make things that are inviting but simultaneously off-putting. THIS IS INTENTIONAL. I am not a crazy person. I promise. (Please keep reading, I love you.)
ALSO, this is why some of the work is already completed in the supplies photo, but none of the heavy lifting. So fear not, dear crafter, I will not leave you behind!
Supplies:

1. Ceramic Baby or other vessel to use as lamp base.
2. ModPodge from Michael's
3. Glitter from Guerra.
4. Elmer's spray adhesive from Michael's.
5. Lamp shade that I took off of an old lamp. (but you can get one at Bed, Bath & Beyond.)
6. Lamp kit from the Home Depot.
7. Steep nipples (teehehehehehe) from the Home Depot
8. NOT PICTURED! Medium paint brush from Michael's
NOW, I had decided, 2 years ago, to cover my ceramic baby in glitter. It seemed like a good idea at the time. So, now I had to finish that work. This is a pretty difficult item to cover in glitter so it took me a full week to finish up. It is also why I used spray glue instead or regular glue.

Spray baby with glue adhesive.
Step 2:

Pour glitter over areas where it needs to be added. Shake it off and let it dry.
Step 3:

Get some ModPodge on your paint brush.
Step 4:

Paint over all the areas with newly added glitter with ModPodge and Let dry.
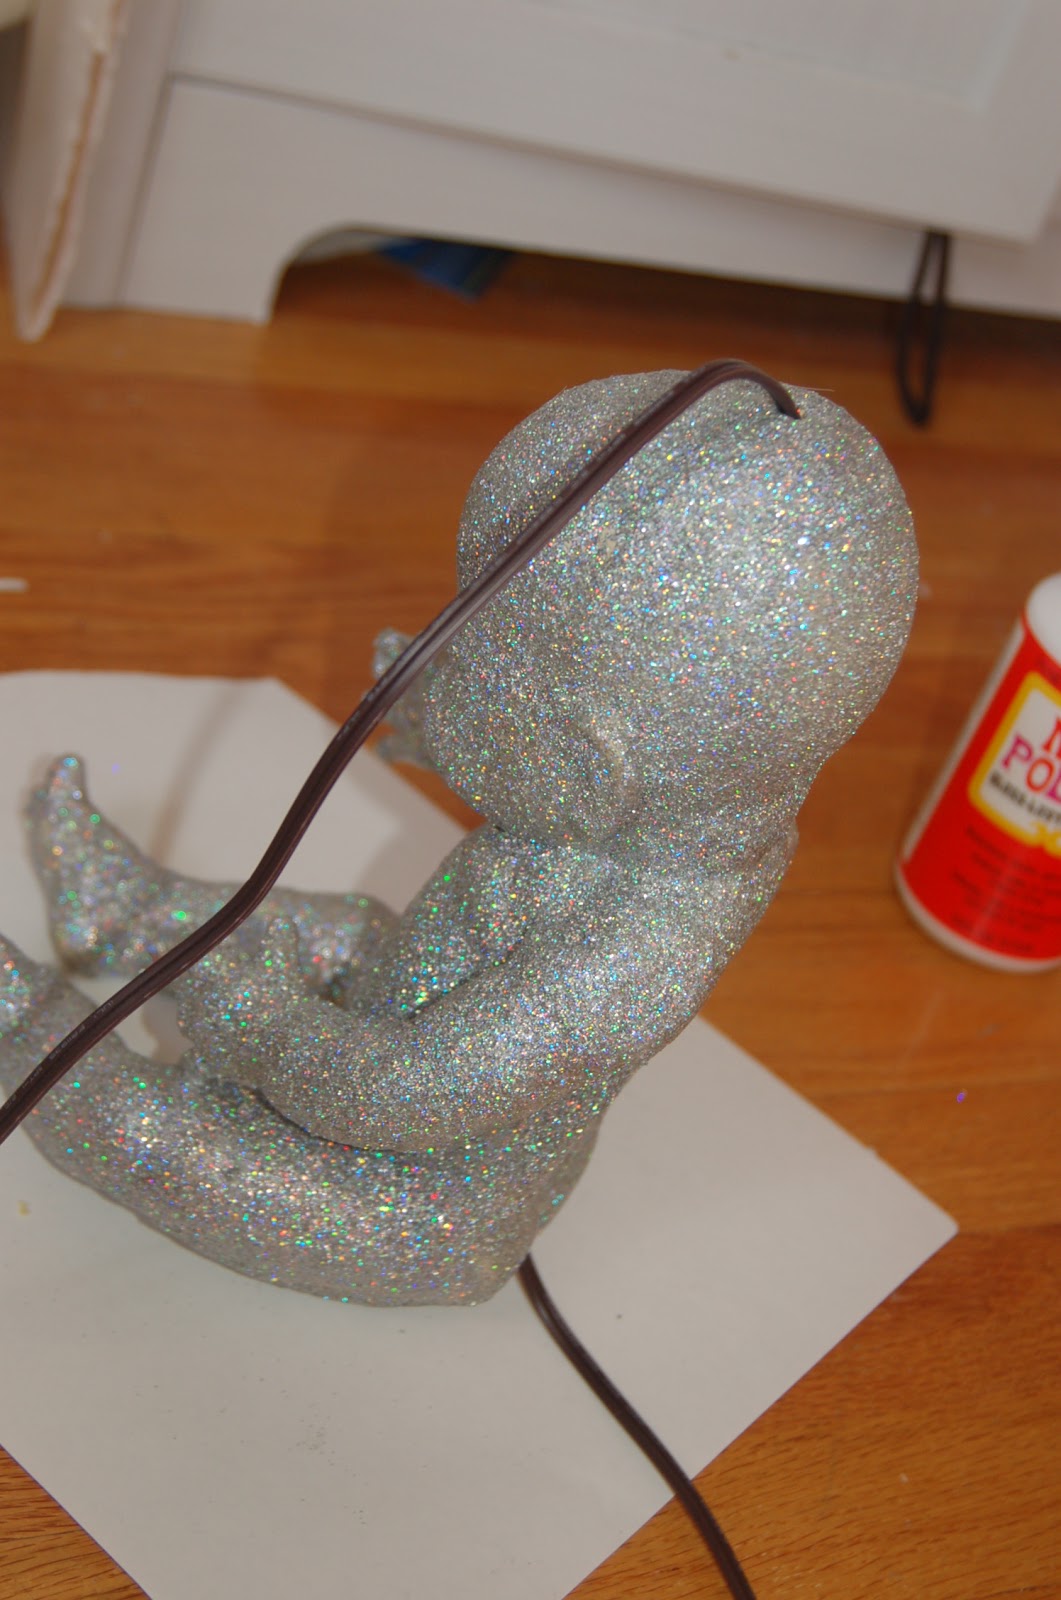
BREAK! In order to make a lamp you need to have TWO HOLES in your vessel. One at the top and one at the bottom edge. This is for the wire to go through. This might look bad, but these are the holes I had drilled in my ceramic baby back in school:


OK, lets move on.
Step 5:

Once your lamp base is prepared to your hearts content, grab the wire from the lamp kit.

Thread the wires from the bottom hole to the top hole.
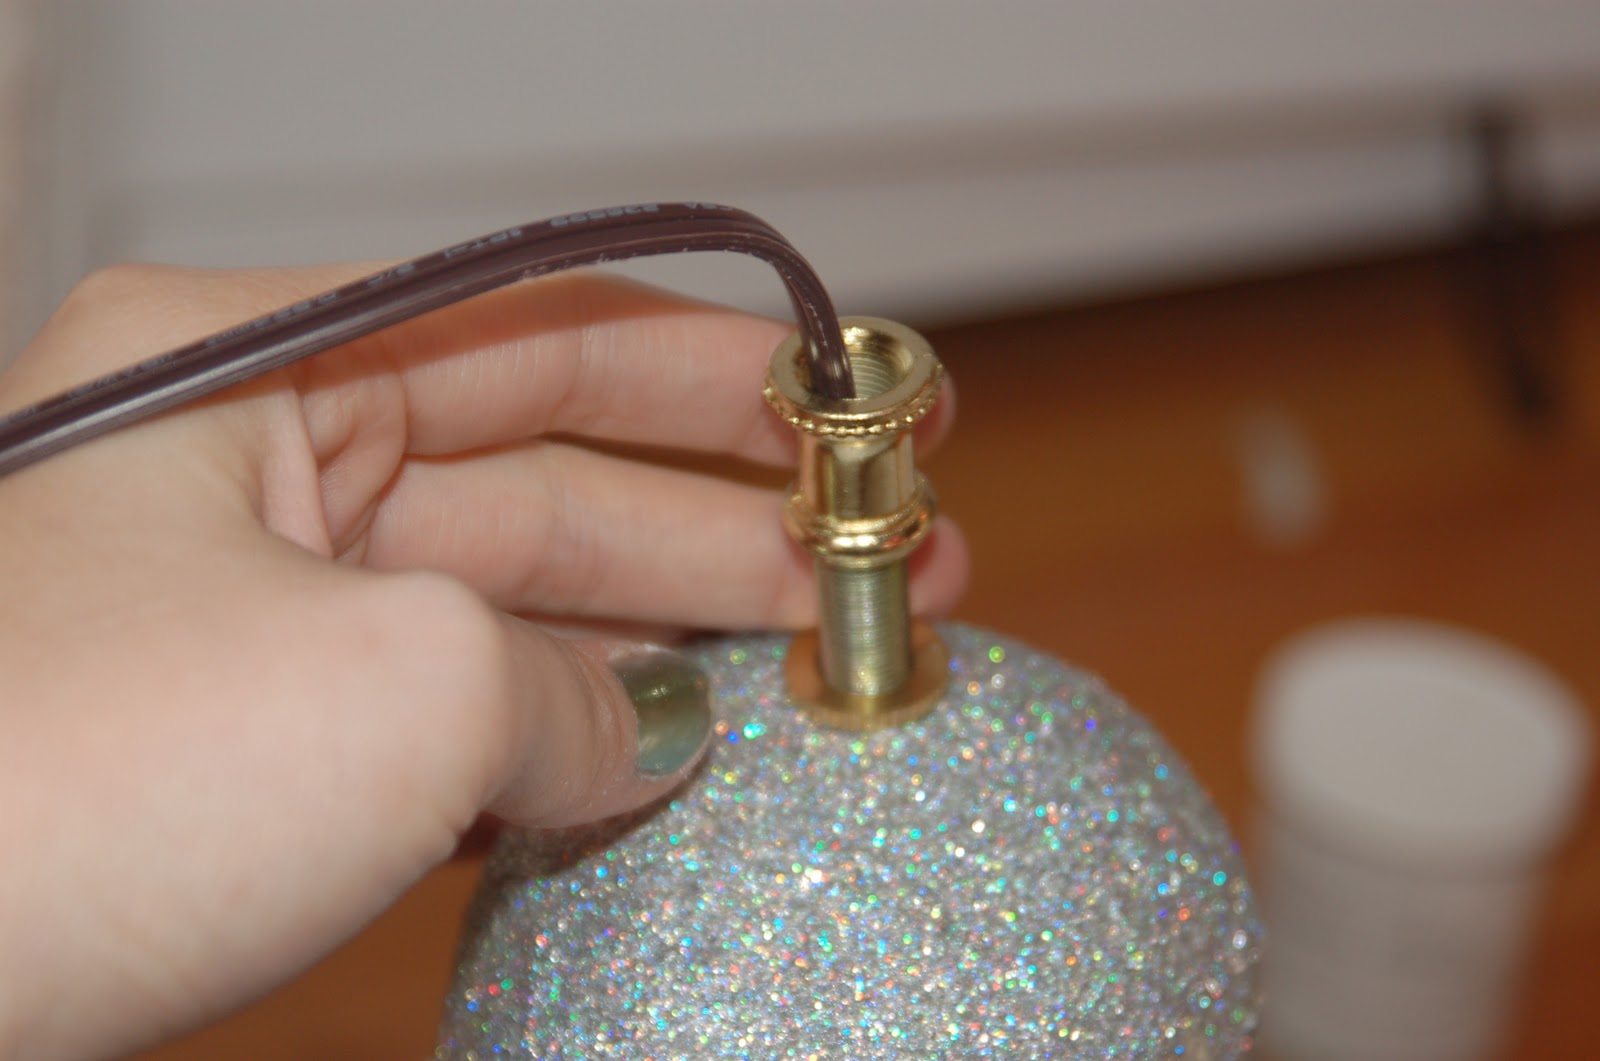
Step 6:
Follow the instructions on the back of your lamp kit. My pictures outline basically what you have to do. But read the instructions. They do it better.


Then pop the plug into an outlet, put in a light bulb, and turn that baby on! (is that too literal?)

LET THERE BE LIGHT!


I left something out. Back when I started this project, years ago, I planned to make many multiple baby lamps. This isn't my first baby lamp! It's my third! (Unfortunately, my asshole cat knocked over baby lamp #1, who is now in a bag, in pieces, in the back of my closet. Let's all share a moment of silence for the baby lamp we have lost.)
Here are my two baby lamps together!

B.F.F.A.E! I totally stole the lamp shade and the light bulb for new baby lamp from old baby lamp. I'm sorry old baby lamp! I promise you will get it back!

e-me your lamps! I can't wait to see what you krazy krafters use for a base! The anticipation is killing me!
2 comments:
LOL. This baby lamp totally freaks me out (as intended?!) and the tutorial simultaneously cracks me up.
Makes me wish I'd gone to art school! Not so I could make a baby lamp per se, but so I could make a ceramic vessel. SO COOL!!!
What a unique lamp idea! I only use LED light bars for my room but this custom made lamp looks so cute that I think I want to try making this at home too. Good job!
Post a Comment